Showing posts with label vegan. Show all posts

February 09, 2012

Mini-Cleansing & Cleansing Beet Juice Recipe


I have been dragging lately - physically and mentally - something has just been "off" the last couple weeks. Then, when I woke up yesterday morning with a stomach ache and a serious case of the grumps, I knew, it was time for a mini-cleanse.

What I mean by mini-cleanse is a gentle reboot of my system. Out with the bad stuff and in with lots and lots of the good. I'm not doing any crazy master cleanse (which, for the record, I don't think is a good or healthy way to cleanse one's body), I'm basically doing a dialled-back version of a full on cleanse, which for me generally includes eating only organic fruits, veggies and non-glutinous whole grains, lots of rest, lots of exercise, loads of water and herbal tea, a trip to the infrared sauna, exclusively 100% natural soaps and no tv/computer.

So, since I'm in super busy, lead-up-to-midterms time at school, doing all of that is just not practical. So instead I'm simply getting rid of the bad stuff (wheat, sugar, salt, caffeine, alcohol) and eating all the fruits veggies and whole grains my body can handle (yum!). I'm also allowing myself trail mix, for when I'm on the go, but obviously salt free trail mix. I'm going to make a point to get better sleep, which I have not been doing very much of lately. Top that all off with lots of water and herbal tea, and hopefully I'll be feeling back to normal in a week.

One way I will be getting all those fruits and veggies in is with fresh homemade juice. One of my favourite juices (which is also very cleansing) is as follows:

Cleansing Beet Juice

1-2 inch chunk of ginger
1 medium beet, scrubbed
1 medium carrot
4 apples
10-20 drops milk thistle, optional

Juice the ginger first, followed by the beet, carrot, and apples. Add the milk thistle drops to the juice, if using, and stir. Serve and enjoy!

Both the beets and the milk thistle are very cleansing to your liver, and your liver is a very important organ! A lot of people associate liver problems with heavy drinking, which is true, but even if you are not a heavy drinker chances are your liver needs some extra tender lovin' care. Our liver is like our body's filtration system, and with all the processed junk we consume it can get pretty beat up.

That's why I love this juice. First off, it's delicious. Even if you are some crazy person who doesn't like beets, fear not, this is not very beet-y tasting. It is actually quite sweet, kinda like an earthy apple juice. Then secondly, it cleans your liver! It's like a delicious superhero. You can be sure I will be drinking this as my afternoon snack everyday this week.

Of course, this juice is good (and good for you) anytime, so no need to reserve it for your next (mini-) cleanse!

Enjoy!

Veg Jenski xo

ps. Here are some other resources you might find helpful:

I highly recommend jae steele's book Get It Ripe. Not only is it full of delicious vegan recipes, but it has really helpful tips on healthy cleansing. You can check out this post from her blog Domestic Affair, in which she talks about fasting, to get a feel for her. Also, I swear by the "Liquid Apple Pie" fibre drink recipe in the post when I'm cleansing (though I leave out the wheat bran and the bentonite clay).

Whole Living had a 21 day cleanse routine that they promoted this January. A friend of mine did it, and she really enjoyed it. Maybe you want to check it out?

If you are interested in juice cleanses, you can check out this post from My New Roots.

January 10, 2012

Pie Making, etc.

Hello dear reader(s?)!

So, you might be wondering where I have been all these months, maybe you've even wondered if Veg had abandoned you forever. Or maybe you haven't . . . . Either way, the blog has been so quiet because I went back to University this past fall. It's something I had wanted to do for a few years now, and I'm really loving every minute of it. However, between school and my job and my attempts to continue having a life, something had to give and sadly it was the blog. I do have lots of new recipes, and some of them will surely make their way onto the blog at some point, but since September it's been "eat when you can eat" and not "eat after arranging your food nicely and taking pictures of it", ya know?

To keep myself sane-ish through all the stressed-out, sleep-deprived, how-the-heck-do-you-make-an-APA-reference-list weeks, I have made a point each weekend to make a pie. Pie making is great for sanity, because it forces you to slow down and be in what you're doing - making a pie.

As some of you surely know, the lovely ladies of The Post Punk Kitchen recently released a new book all about making vegan pies, Vegan Pie In The Sky. When it arrived, on a cold, blustery Autumn day, as my head was spinning from hundreds of pages of reading, that's when I knew - I was to bake my way through this book with whatever time I could spare. And thus, my weekend pie making adventure was born.

So, I'm going to tell you a little about my experience making some of the pies from this book. I'm not going to tell you the recipes, you can get the book yourself (and you should!). The PPK website has some sample recipes from the book, including three of the pies I have tried, so if you're not convinced that this book is a good investment, give 'em a try and see!

Without further ado;

Week 1 - Maple Pecan Pie

Up front, this was the first pie I made and it may be my favourite. There really isn't even much to say about this pie other than it was incredibly delicious and relatively easy to make. Admittedly, the crust was only so-so (I've been generally displeased with how the crusts from this book turn out, but more on that later), but the rest of the pie was soooooo good that honestly in this case the crust just didn't matter that much. And if you think that is a completely blasphemous thing to say, full disclosure, I am a crust girl. Generally when I'm eating a pie, the crust is all I'm really caring about. I will savour every last bite of crust, often scooping out filing and eating it, just so that I will be left with perfect little bites of (vegan) buttery, flakey goodness. So, when I say that crust is not the star of this pie, I really mean it.

And lucky you, this is one of the sample recipes on The PPK. Click here to enjoy!

Week 2 - Key Lime Pie

I was so excited for this pie, like kid-on-xmas-morning excited, and after my sterling success with the maple pecan pie, I was feeling pretty sure of my pie making abilities. But then tragedy struck! After making the filling and putting it in the fridge for three hours to set, it was still a pie pan of liquidy-lime goo! So, I waited. Six, seven, eight hours went by and the filling was no more solid than when I had poured it over the crust all those hours earlier. So, I put the pie in the freezer. It firmed up and became a very enjoyable freezer dessert. Not quite the creamy key lime pie I had dreamed of, but all's well that ends well, right?

After much thought on what went wrong, I've decided the most likely culprit was the agar agar. I used agar agar flakes, as it was what I had on hand, instead of agar agar powder. I'm pretty sure that was my fatal error, so please learn from my mistake dear reader. Don't cheap it on the little, but important ingredients!

And just a note on the crust - This pie had a cookie crust, as did the next few, and I have found the cookie crust and it's variations in the book very reliable. I have just been disappointed in the traditional pie crust recipes in the book, three of which I have tried so far - The Single (and Lovin' It) Pastry Crust, The Olive Oil Double Crust and The Puffy Pie Dough. I've already mentioned the first one, which went with the maple pecan pie, and I'll get to the others shortly.

Week 3 - Chocolate Galaxy Banana Cheesecake

Right now you're like, "What?!?!? I thought this was a post about pie?" but many a cheesecake is included in Vegan Pie In The Sky, and why not? They are round, they have crusts, they are eaten in pie-shaped slices. I had never thought about it before this book, but now I'm all up on the cheesecake-as-pie craze.

And the cheesecake recipes in this book are some of the best I have ever come across. Instead of using several (expensive!) tubs of Tufutti, the creamy cheesecake texture comes from a combination of silken tofu, mashed banana and soaked cashews. Blend it all up with a few other things and you have a truly delicious, authentic and economical cheesecake.

This cake/pie was great! I'm not sure why it jumped out at me, because I'm not that into bananas generally. I mean, I'll put them in my smoothie, but you won't catch me gleefully eating banana bread or anything. But I loved this cake/pie! Creamy banana cheesecake, with pretty swirls of chocolate on a chocolate cookie crust, yes please! Actually writing about it is really making me want to make another one!

Week 4 - Pumpkin Cheesecake

Again, delicious. Not much more to say about this one. It was awesome. Mind-blowing, even. Take a look for yourself here, and then make one of your own!

Week 5 - Old Fashioned Chocolate Pudding Pie

This one was good and easy to make, but it made me remember that I don't like pudding. It's been so long and the photo that accompanied that recipe looked so good (as evidenced here) that I just had to have it. But then it came to eating it, and I was like "oh yeah, the texture of pudding totally makes me gag!" So, if you love pudding, you should make this pie (and you can with the link above). If you don't like pudding, then move along.

Week 6 - Apple Crisp

I had some company the night that I made this crisp, and the poor thing did not survive to see the light of day. Simple, comforting, delicious. Everyone went back for seconds and thirds, with good reason. Not that I have ever met a crisp I didn't like, they are pretty hard to screw up. But this one . . . . well, you'll just have to try it for yourself and see. Sadly, there is no recipe link for this one, so let's just call it incentive to get yourself a copy of this amazing book!

Week 7 - Cosmos Apple Pie

The filling of this pie was excellent. The crust so-so, and unlike the maple pecan pie, the insides just didn't make up for the outsides for me. I used the olive oil double crust for this one. I found it difficult to work with, especially in rolling out and the end result wasn't flaky at all. It turned out thin and kinda hard. However, overall this was still an enjoyable pie.

The recipe made way too much filling though, so I put the left over in the fridge for the following week (Week 8). When time came I was just going to make a second apple pie, but then realized there wasn't quite enough apples to fill a whole pie. So I dumped in some mixed frozen berries and waited to see what would happen. The results were amazing! Seriously one of the best pies I have ever tried. I have always been partial to berry pies, but something really magical happened when the berries and apples met inside that pie.

It wasn't until a couple days ago when I was flipping through the book, looking for my next pie conquest that I realized I had inadvertently made the Appleberry Pie! Well, sort of. Because I had started out with apple already seasoned for apple pie and just dumped in the mixed berries, it wasn't the exact recipe. Still, the same idea.

And because I'm open-minded, I wasn't ready to write off the olive oil crust. I gave it another shot with the "appleberry" pie, with a few tweaks, but I was still not happy with the results. Sadly, I think I won't be using the crust recipes from the book anymore. I will enjoy the delicious filling recipes in my old-reliable pie crust. I've mentioned it here before, but I'll say it again, the Flaky Pie Crust from Colleen Patrick-Gourdreau's Joy of Vegan Baking is my go-to crust and the best vegan pie crust I have ever tried. So while you're at the store grabbing your copy of Vegan Pie In The Sky, grab The Joy of Vegan Baking too, and become a vegan baking god!

Week 9 - Figgy Apple Hand Pies


It's actually unfortunate to be finishing here, because these were the disappointment of the bunch. From the Washington Post to The PPK 100, everyone seems to have agreed hand pies are the next big thing in potable desserts. However, my first attempt at the palm-sized treats didn't go quite as I had imagined. All week I had been looking forward to the weekend, dreaming of the flaky/sweet/gooey delights in store. So, maybe the end result was even more crushing than it would have been if I were just making a regular-sized pie. Who knows?

They weren't  . . . bad . . . . They were just . . . not good. The crust (the puffy pastry dough) was hard and dry, not flaky as I'd expected. The filling was very tasty, but not gooey enough to counteract the dryness of the crust. At first, I thought maybe I should have eaten them right out of the oven, and letting them cool was a mistake. However, they were actually better the following day. Not that they became great over night, they were just somehow better.

There are several hand pie recipes in the book and I'm not ready to give up yet. Hopefully I get some decent hand pies soon, before the fickle dessert-eating-public moves on to eclairs or whatever.

I'll try to keep you guys posted on my pie making, I'm sure there are many more delicious spheres of pastry to come. And one of these days you just might get a new recipe, too!

Veg Jenski xo

August 13, 2011

Raw Ginger Peach Granola


Peach season is in full swing and I just can't get enough of 'em. Peaches get along swell with my very favourite root, ginger (just ask herbal tea drinkers everywhere), so the pair where a natural choice to dress up some raw granola.

This quick breakfast or snack will keep you feeling full and energized till your next meal and it's darn tasty too! Feel free to top it with nondairy milk, nondairy yogurt, or whatever you usually like your granola with, but personally I love it all on it's own. The mix of textures - crunchy nuts, chewy dried cranberries, juicy peach chunks - is heavenly to me and the flavours marry so well, it almost seems a shame to drown it in almond milk.

To make it truly raw be sure to use raw coconut flakes and raw dried cranberries. If you are not on a strict raw food diet you can use regular unsweetened coconut flakes and unsweetened dried cranberries, it's delicious either way.

Raw Ginger Peach Granola


Makes one serving

One ripe peach, pitted and diced
3 tbsp slivered almonds
2 tbsp walnut pieces
2 tbsp unsweetened coconut flakes
2 tbsp dried cranberries
1/2 inch fresh ginger, peeled

Put all the ingredients except the ginger in a bowl and toss lightly. With a microplane grater, grate the ginger over the bowl. Mix the ginger in thoroughly.

Add nondairy milk or yogurt if desired and serve immediately,

Enjoy!

Veg Jenski xo


June 15, 2011

Ethiopian Kale Over Quinoa


This recipe is pure, simple and delicious. Kale and quinoa - two real superfoods - are prepared simply in Ethiopian inspired spices to create a harmonious dining experience. While eating this meal you are likely to sit back and think, "I should move to the mountains and meditate and eat this everyday - and live blissfully to 150 years-old".

This meal is so nutrient rich, I don't even know where to start! Quinoa is a complete protein, high in iron, phosphorus, magnesium, folate and is gluten-free. Kale is quite possibly the most nutritious vegetable in the world, containing antioxidants, high levels of vitamin A, K & C, beta carotene and calcium. And I'm really just naming a few of the good things in these two wonderful foods!

The dish is rounded out with carrots, ginger and spices - all boasting health benefits of their own.

The following spice mix recipe is a take on the Ethiopian spice mixture, berbere. If you can find real berbere, by all means, use it! But it is tricky to find in North America, so this version will suffice. The recipe makes more than you will need for the kale, which is great because you will be spicing everything with it once you taste this dish.

Berbere Spice Mix

1 tbsp paprika
1/2 tbsp onion salt
2 tsp ground red pepper
1/2 tsp garlic powder
1/2 tsp dried basil
1/4 tsp ground ginger
1/8 ground black pepper
pinch each: ground cloves, cinnamon, cardamom, nutmeg, allspice, cumin and tumeric

Blend the spices well and keep in an airtight jar.

Ethiopian Kale Over Quinoa

Makes 2 servings

1 cup quinoa
2 cups water
1 inch fresh ginger, divided
2 tbsp olive oil
1 large carrot, quartered lengthwise and sliced into chunks
1 hot pepper (varitey of your choice), minced
1/2 tbsp berbere
1 bunch kale, stemmed and leaves torn

In a pot, combine the quinoa and water. Grate half of the ginger into the pot and stir to combined. Cover and bring to a boil. Reduce heat and simmer for 15 minutes, until all the water is absorbed.

Meanwhile, heat the oil in a large skillet over medium heat. Add the carrots and pepper, and grate the remaining ginger into the mix. Toss, cover and allow to cook, stirring occasionally for 10-15 minutes until the carrot is softened and starting to brown. Uncover and incorporate the berbere. Add the kale, and stir constantly until the kale is coated in the spices and has wilted down, about 3-4 minutes.

Plate the quinoa and top with the kale mixture.

Serve and Enjoy!

Veg Jenski xo

June 08, 2011

Papaya Salad


Ok, so this salad definitely isn't local, but it is delicious, nutritious and very filling! It is a perfect meal for a hot day when you need something to cool you off and transport you to an imaginary tropical paradise.

For the greens I used baby spinach and arugula (both of which are local and seasonal). Arugula's peppery taste is a perfect compliment to the citrusy-sweet thing going on between the salad dressing and the papaya. And you all know how I feel about spinach (see Spinach Pie Two Ways).

This recipe marks my first post with nuts, which is kind of odd beacuse I eat nuts everyday. The cashews add a lovely crunch to this mostly soft salad, but can be omitted if you suffer from nut allergies.

And I've said it before, but it bears repeating: Roll your limes before juicing them! You will get way more juice out of them this way, for real. Just roll them under you hand on the counter while applying gentle pressure. Then slice, juice and enjoy your hard earned lime juice!

Papaya Salad

Makes 4 servings

For Dressing:

Juice of two limes (about 4 tbsp)
1 tbsp coconut oil, at room temperature (so it's in liquid form)
Salt & Pepper, to taste

For Salad:

2 cups baby spinach
2 cups arugula
1 papaya, peeled, seeded and cubed
2 avocados, peeled and cubed
1/2 cup raw cashews
Lime slices or wedges for garnish (optional)

To make the dressing: Mix the lime juice and coconut oil in a small bowl, until well combined. Add a couple dashes of salt and pepper, to taste. Set aside. A note on salad dressing: If you're new to making your own salad dressing, when you taste your salad dressing it should be slightly more acidic than you want it to be. The water in the greens and fruit will neutralize the acidity. 

To make the salad: Spin the spinach and arugula in a salad spinner, then transfer to a salad bowl. Top with the papaya, avocado and cashews and toss. Dress, toss and serve immediately. If you want the salad to look like it does in the picture: After spinning the greens, plate them on four plates and top each with a quarter of the papaya, then a quarter of the avocado, then sprinkle with a quarter of the cashews. Drizzle with a quarter of the dressing (about 1 1/4 tbsp for each serving) and top with a lime slice. Serve immediately after dressing.

Enjoy!

Veg Jenski xo

June 01, 2011

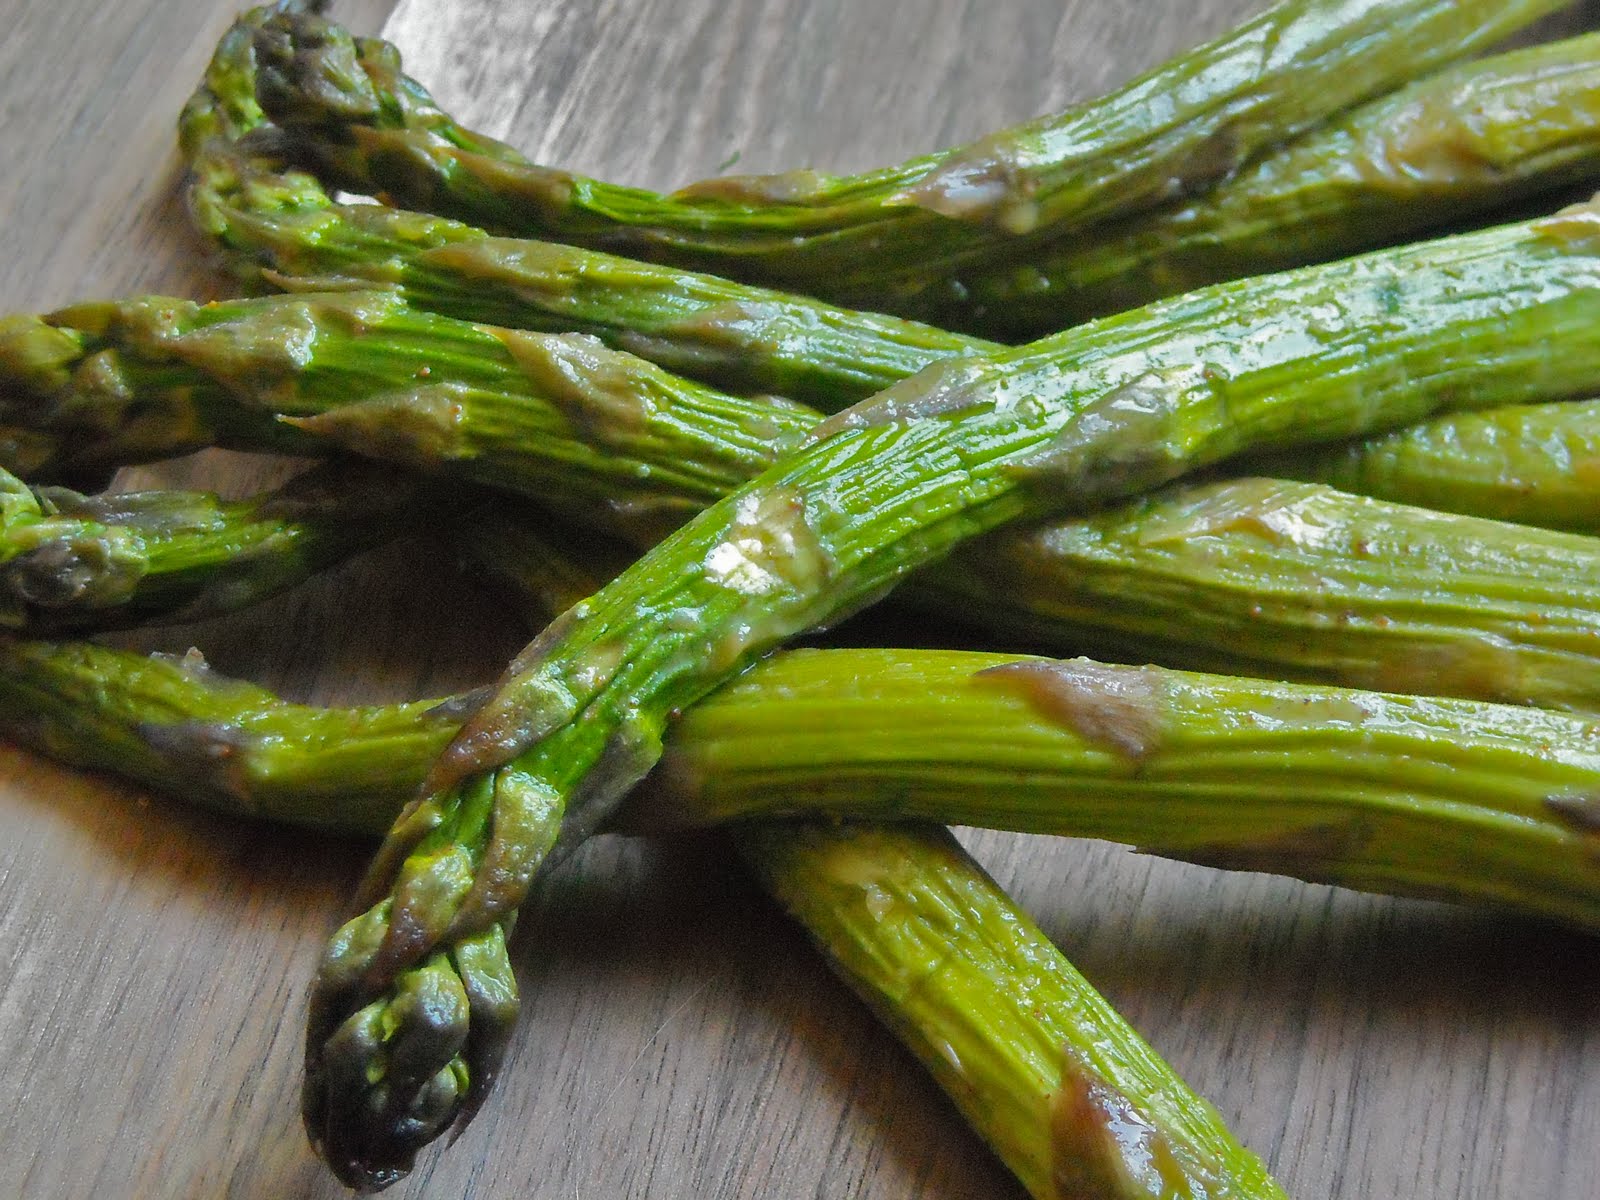
Garlic-Chili Asparagus


More asparagus! I just couldn't help myself really. I gorge myself on asparagus this time of year, when fresh local spears abound and you should too.

Also, after last week's long, multi-tasking recipe I wanted to show the simpler side of asparagus. Asparagus needs very little to be absolutely delicious. Most of the time I just boil it for about 5 minutes in lightly salted water or roast in for 10-15 minutes in a little (vegan) butter.

Today's recipe takes the simplest roasted asparagus and infuses it with a little pizazz. The chili and garlic flavours boost the asparagus without being overly pronounced, so it works as a side next to just about any meal. But if you're planning a Mexican feast, definitely use the optional lime wedges to kick the flavour up.

Garlic-Chili Asparagus

1 tbsp Earth Balance (I use the soy-free variety) or other vegan margarine
1/2 tsp chili powder
pinch garlic powder
1 bunch asparagus, ends trimmed
a couple pinches sea salt
1 lime, cut into wedges (optional)

Preheat the oven to 450º

Put the Earth Balance in a small bowl and add the chili and garlic powders. Stir until well combined and the Earth Balance is softened. (What you just made is called a compound butter - basically butter with seasoning mixed into it, but compound butter sound so much fancier. When people ask you how you made this asparagus, make sure to say "oh, well I just made a compound butter and brushed the asparagus with it" - they will be impressed.)


Put the trimmed asparagus spears into a roasting pan and brush them with the compound butter, make sure to get all sides and the tips of the spears. Sprinkle with sea salt and put the pan in the oven.

Roast for 10-15 minutes, depending on the thickness of the spears. They're done when the shafts can be easily pierced with a fork.

Give them a squeeze of lime juice (if using) from one of the wedges and serve with the remaining wedges.

Enjoy!

Veg Jenski xo

May 25, 2011

Springtime Casserole


Nothing says Spring quite like asparagus (with the possible exception of rhubarb) and it stars here in this super nutritious casserole. Pair this with a simple green salad and you have a meal sure to impress the capri pants off your dinner guests. 

There is a lot going on in this dish, and I know the instructions may seem a little daunting at first glance, but I promise you it's worth the little bit of extra work and comes together a lot quicker than the instructions would lead you to believe!

But before we go any further, I would like to take a moment to talk about fiddleheads: 

What are fiddleheads, you ask? These are!

Fiddleheads are wonderful. I would have started this post with "nothing says Spring quite like fiddleheads" if it wasn't for the very short period they are in season, which makes them hard to squeeze into most people's culinary lives. For this, and a few other reasons I will mention shortly, the fiddleheads in this recipe are optional and can easily be replaced by a second bunch of asparagus. Asparagus and fiddleheads have a very similar flavour, so it doesn't take too much away from the casserole to go without - but if you want to fully ensure the aforementioned impressing of dinner guests, the fiddleheads are the clincher.

Fiddleheads are the trimmed tips of the fiddlehead fern. They contain Omega 3 and 6, are high in iron and fibre, and I recently read a little blurb on them in a magazine that mentioned a possible link between the alpha-carotene they contain and longevity. Pretty cool, huh? 

But, with the good comes the . . . .

If you haven't worked with fiddleheads before it is important to note that they must be cooked properly. Fiddleheads can cause food poisoning if prepared incorrectly, so please take a moment to read this helpful info sheet and fear not, I will go over this again in the recipe instructions. 

All this being said, don't get too paranoid and pre-boil the heck out of the poor things, they are very delicate and will begin to disintegrate if over cooked. As long as you follow the instructions they won't make you sick.

Now back to the casserole!

As I said at the beginning of this post, this casserole packs a lot of nutritional punch (aside from being just plain delicious, if I do say so myself). You have the asparagus, which is chalk full of vitamins, minerals, protein and dietary fibre, the sauce, which is made from eggplants (this is an excellent way to get people who are not fans of eggplant to eat eggplant) which is rich in vitamin C, and all this tops a tasty polenta crust, which is gluten-free, a great source of protein (a serving of polenta contains more protein than an egg) and it also contains several vitamins and minerals, like A, C, potassium and phosphorus.

When choosing your cornmeal for the polenta, always go organic. This goes for all corn products as a lot of the conventional corn out there comes from genetically modified seeds, and there are no labelling laws in Canada for genetically modified foods.  Some countries do have labelling laws, so if you're not sure if they do where you live, look into it! Less GMOs is better for you and better for the planet.

So, without further ado, here is the recipe:

Springtime Casserole

Makes 6-8 servings

The Veggies:

1 bunch asparagus, ends trimmed and stalks cut in half 
about 2 dozen fiddleheads or another bunch asparagus, prepared the same as the first bunch
2 tbsp olive oil
4 cloves garlic, minced
5 or 6 cremini mushrooms, stemmed and sliced

For Polenta Crust:

3 cups water
1 tbsp olive oil
1/2 tsp salt
1 cup medium grind cornmeal

For The Sauce:

1 very large or 2 medium eggplant(s), peeled and cubed
1/2 cup canned crushed tomatoes
2 roasted red peppers, pureed in a small food processor or blender
1 tsp dried oregano
1 tsp dried basil
1/2 tsp salt
1/2 tsp ground black pepper
a pinch or two of cayenne pepper

If you are using the fiddleheads, prep them first as follows: trim the ends and pick off as much of the bits of brown skin on them as possible. Put them in a colander or strainer and rinse under cold water for several minutes, tossing them as you rinse to make sure they are thoroughly cleaned. Bring a small pot of water to a boil and boil the fiddleheads for 10-15 minutes. Strain the fiddleheads and set aside. Discard the boiling water and clean the pot thoroughly.

Prep the asparagus by blanching in boiling water for 5 minutes. Strain and set the asparagus aside.

Lightly oil a 7x11" (or similar sized) baking dish. Set aside.

Next prepare the polenta: Combine the water, oil and salt in a pot and bring to a rapid boil. Turn the heat down to medium-low (really as low as it will go without ceasing to boil) and slowly pour the cornmeal in, stirring constantly. Continue to stir for about 3 minutes until the polenta is a smooth thick consistency. Immediately transfer the polenta to the baking dish, and smooth it to create an even bottom crust. Set aside. For first time polenta makers: while you're stirring, the polenta will bubble and spit up at you. So seriously, turn the heat down as low as possible! Usually I will turn the dial down to 2 or 3 while I am pouring the cornmeal in to the water, and then I will turn it down more to just above 1, about a minute into stirring, as soon as I see the first signs of bubbling.

Next prepare the sauce: Put the eggplant cubes in a pot and fill with water. The water doesn't need to cover the eggplant, as long as it comes about half way up. Put the pot over high heat, cover and bring to a boil. Cook for 8-10 minutes, until the eggplant is very soft. Turn the burner off and remove the pot. Strain and return the eggplant to the pot. Mash the eggplant with a potato masher until very smooth. Turn the burner back on to low and return the pot to the heat. Stir in the tomatoes, red pepper, oregano, basil, salt, pepper and a pinch of cayenne. Stir until well combined and heated through. Taste and adjust salt, pepper and cayenne to your tastes. The sauce should have a peppery kick, without being spicy. Set aside.

Preheat the oven to 350º

Heat the oil in a large frying pan over medium low heat and add the garlic, sautéing for a minute or two until fragrant. Add the asparagus and toss until coated. Allow the asparagus to cook for 5-10 minutes, tossing once or twice. Add the mushrooms and fiddleheads (if using) and toss gently to combine. Cook, stirring once or twice, until the mushrooms begin to release their liquid. Add the sauce to the pan and stir to combine. Remove from heat and pour over the polenta crust, spreading gently to evenly distribute the mixture.

Transfer the casserole to the oven and bake for 10-15 minutes until it is heated through.

Serve and enjoy!

Veg Jenski xo


May 17, 2011

Herbed Yukon Gold Home Fries


After a very long post last week I’m going keep this one short and sweet (well . . . short and savory, I guess).
These potatoes are quick, easy and absolutely delicious! Seriously, I ate the whole test batch in one sitting. They are also super versatile and would be just as at-home next to (vegan) sloppy joe’s as they would be siding a fancy-shmancy portobello steak and salad.
One of the best things about Spring and Summer is fresh local herbs and this recipe really lets them shine. Try mixing and matching different combinations of the suggested herbs. The combo I used (in the picture above) is tarragon, marjoram and rosemary, but change it up depending on your mood or what you have around.
Thyme, Rosemary & Marjoram

Herbed Yukon Gold Home Fries
Makes 4 side dish servings
¼ cup loosely packed leaves of each of the 3 fresh herbs you choose (suggested herbs: Savory, Thyme, Rosemary, Tarragon, Marjoram)
2 tbsp olive oil
Salt & Pepper to taste
4 medium-large Yukon gold potatoes, scrubbed and chopped into thick wedges
1 medium yellow onion, sliced in half moons


Preheat the oven to 425º
In a blender or small food processor, blend the herbs and oil until well combined. 
In a bowl toss together the potato wedges and onion slices. Toss in the herb mixture, salt and pepper, until the potatoes are well coated.
Spread the potatoes on a parchment lined baking sheet and put in the oven. Bake for 25 minutes, until the potatoes are browned and easily pierced with a fork, and the onions are beginning to caramelize.
Enjoy!

Veg Jenski xo

May 11, 2011

Spinach Pie Two Ways


Spinacea oleracea, how do I love thee? Let me count the ways . . . In dips and salads, in smoothies and soups, in curries and spanakopita, in wraps and . . . Pie!
Yup, me and spinach, we love each other – well, maybe it’s only a one-way love affair, but it’s passionate nonetheless. So, it being early spring – the best time to get local spinach – I obviously wanted to feature my beloved leafy green.
Spinach contains more protein than other leafy greens and is chalk full of tons of vitamins (A, B, C, K) and minerals (phosphorous, iodine, magnesium, calcium, potassium and iron). It is important to note that spinach looses certain minerals in the cooking process – calcium, for example – so make sure to eat plenty of raw spinach in wraps, smoothies and salads.
Make sure to clean spinach well before using (yes, even that “triple washed” clamshell kind) and always – ALWAYS – buy organic. I’m not super diligent about organic for everything, but conventional spinach is notoriously sprayed with all kinds of nasty things, so organic is a must. And as always buy local whenever possible!
Spinach can be thrown into just about anything – toss some baby leaves into your next salad, blend it along with fruit and berries for an extra nutritious smoothie, toss it in to any soup, stew or curry in the last few minutes of cooking, or you can even use a big leaf as a wrap, filling it with hummus and your favourite veggies. 
Clearly, what's not to love?
When I started work on this week’s recipe, I knew I wanted to make a vegan quiche that didn’t dress tofu up as eggs, and of course when I thought quiche I thought spinach. I came up with two drastically different takes on the concept and I couldn’t decide which I liked better, so I have decided to share two recipes with you this week: Italian Spinach Pie & West Indian Spinach Pie.
The Italian take, has a creamy sauce and is bursting with some of my favourite things – fresh basil, cremini mushrooms and sun-dried tomatoes – while the West Indian version has a sweet coconut curry twist and a gorgeous orange colour.
For the crust I used the “Flaky Pie Crust” from Colleen Patrick-Goudreau’s The Joy Of Vegan Baking, omitting the sugar, but you can use any pie crust you fancy. I do highly recommend Ms. Patrick-Goudreau’s crust though, so go pick up her book! (I also just highly recommend her in general, so if you don’t know her check her out!).
Here are the recipes and the more recipe specific notes:
Italian Spinach Pie

1 prepared, pre-baked (or blind baked) pie crust

1 tbsp olive oil
1 medium leek, sliced lengthwise and chopped
3 - 4 cloves garlic, minced
2 cups cremini mushrooms, stemmed and quartered
2 tbsp vegan margarine (I use Earth Balance soy-free)
2 tbsp flour
1/4 tsp salt
1/4 tsp ground black pepper
1/4 tsp dried oregano
1/4 tsp dried basil
1 scant cup almond milk, or nondairy milk of your choice
1 cup fresh basil leaves, tightly packed
4 - 4 1/2 cups spinach leaves
4 sun-dried tomatoes, thinly sliced

Preheat the oven to 425º

Heat the oil in a large frying pan over medium heat. Add the leeks and garlic, and sauté until the leeks begin to soften and the mixture become fragrant, about 3 - 4 minutes. Add the mushrooms and continue to sauté until the mushrooms begin to release their liquid, another 3 - 4 minutes. Set aside.

In a medium-large pot melt the margarine over low heat. Add the flour, stirring constantly for 5 minutes until you have a thick amber brown mixture (this is called roux and acts as a thickener). Slowly pour in the milk, stirring constantly to combine until smooth. Add the salt, pepper, oregano and basil, stir. Raise heat to medium and continue to stir the mixture. Give the sauce a few minutes to heat up, then begin to add the basil and spinach in large handfuls. After each handful, stir the greens to incorporate into the sauce and allow them to begin to wilt before adding the next handful. 

After adding the final handful of greens, remove the pot from the heat and continue to stir while the last of the greens wilts. Add the mushroom mixture and sun-dried tomatoes. Stir until they are well incorporated. Pour the mixture into the prepared pie crust.

Put the pie in the oven and cook for 25 - 30 minutes, until the crust is nicely browned and the filling appears firm on top.

Let stand 10 - 15 minutes before serving.

Notes:
- This pie's filling is very creamy, so it is really important that you pre-bake the crust or the bottom of the crust will not bake properly.
- You could use white button mushrooms if you prefer, but they won't provide the same wonderfully earthy flavour that you get from cremini or baby bella's.


West Indian Spinach Pie

1 prepared pie crust (you can pre-bake this one too, but it is not essential like in the last recipe)

1 tbsp coconut oil
1 small yellow onion, chopped
3 - 4 cloves garlic, minced
1 inch fresh ginger, peeled and minced
Red pepper flakes, to taste
1 (170g) box coconut cream
1 - 2 tbsp indian curry paste
1 - 2 tbsp almond milk, or other nondairy milk
1/3 cup fresh cilantro leaves
4 - 4 1/2 cups spinach leaves
1 cup cooked chickpeas or red lentils
Salt and pepper, to taste

Preheat the oven to 425º

Heat the oil in a large frying pan over medium heat. Add the onions, garlic, ginger and red pepper flakes, and sauté until the onions become soft and translucent. 

Add the coconut cream and curry paste and stir constantly until the cream has soften and all the ingredients have combined into a paste. stir in the milk, using just enough to thin the mixture slightly, you do not want to make it runny! 

Add the Spinach in large handfuls. After each handful, stir the spinach to incorporate into the sauce and allow it to begin to wilt before adding the next handful. Once all the spinach is combine add the cilantro, beans, salt and pepper, stir to incorporate and remove from heat. Fill the prepared pie crust with the mixture.

Put the pie in the oven and cook for 25 minutes, until the crust and filling is nicely browned.

Let stand 10 - 15 minutes before serving.

Notes:

- Coconut cream is different from coconut milk, but it can be found next to the coconut milk in most well-stocked grocery stores and in specialty markets.

- If you don't have coconut oil, you can substitute another cooking oil (such as canola, olive or sunflower) but the coconut oil is really what gives this sweet curry its West Indian flare.

Enjoy!!

Veg Jenski xo


May 04, 2011

Cilantro-Lime Beet Burgers


This week at the Market I picked up a huge bag of local quebec grown beets for $2! I don't eat beets enough, but I have been meaning to use them more for quite awhile, so this seemed like the time to give it a go.

Beets are great - they are grown locally all year round, they're rich in potassium and fibre, and they boast that beautiful red colour that can also be used as a natural food colourant. Beets have a uniquely earthy/sweet flavour and are a lot more versatile than they often get credit for.

So, with my bag of beets in hand I rushed home to begin my beet adventure!

While trying to decide what to do with them, I thought of a restaurant in my neighbourhood that serves these crazy veggie burgers made of pureed beets, ground nuts and oatmeal - crazy good, that is. So, with their inspiration I decided to create a beet burger of my own.

These burgers are really quick and easy to throw together - and they are super flavourful, with only a handful of ingredients. They are also reminiscent of a ground beef burger in look and feel - well, reminiscent in a vegetable-y way - making big, thick, meaty patties.

Try them on a whole wheat bun, topped with sliced avocado (as pictured above) or even better, fresh homemade guacamole. Or, try them with your favourite go-to burger toppings - anything goes!

Enjoy!

Cilantro-Lime Beet Burgers


Makes 6 burgers


2 19oz cans white kidney beans, drained & rinsed
3 limes, juiced
1/8 cup water
A few large pinches of salt & pepper
2 1/2 cups grated beets (2-3 beets, depending on size)
3/4 cups chopped fresh cilantro

Preheat the oven to 350º

Combine the white beans, lime juice, water and a couple pinches of each salt & pepper in a pot over medium heat. Stir occasionally until heated through, about 5-10 minutes. Remove from heat and mash until you have a nice thick white bean paste. Add another pinch or two of salt and pepper, to taste.

In a large bowl combine the bean mash with the beets and cilantro. Mix thoroughly.

With your hands form into 6 thick burger patties and place on a parchment lined baking sheet.

Bake for 20 minutes, then flip and bake for another 15 minutes.

Top and enjoy!

Recipe Notes:

- The bean mash should make about 2 1/2 cups, and can also be enjoyed on its own as an alternative to mash potatoes, with a lime-y kick!
- Roll the limes on a table under your hand before juicing to get the most juice out of them